Using a desktop recorder to record screen for how-to tutorial and E-learning is never new. Yet, the trend is gaining ground as growing businesses and face-to-face communication are restrained to be conducted online due to the global pandemic.
So, whether you are an e-Learning course trainer or a frequent webinar user, or a vlogger with lots of needs for video tutorials, you gotta have a free and brand-new way to record screen today.
In this article, we will introduce you to the latest online in-browser desktop recorder and show you how to record your screen with it. So, you can sit back at home and enjoy free and easy screen recording for business and leisure at will.
Contents:
What Is An In-Browser Desktop Recorder
As the name suggests, an in-browser desktop recorder is a user-friendly and windows-based screen recorder that allows you to easily record full screen for how-to video tutorials, e-learning, or e-conference, etc.
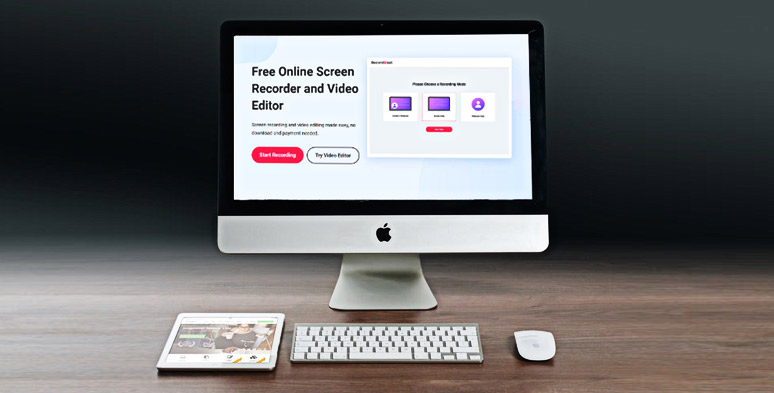
Latest in-browser desktop recorder RecordCast
Benefits of Using the Latest Desktop Recorder
Take the latest desktop recorder---RecordCast for example. Here are some of the benefits you can enjoy using this versatile screen-recording and video editor tool:
- No Software Download Needed. You don’t have to download any software(either free or paid). With in-browser technology, there is no need even to download a chrome extension as well. Time-saving and hassle-free.
- Free of Charge for 3 Screen Recording Modes. You easily select “Screen + Webcam”, “Screen Only”, or “Webcam Only” mode to complete both video and audio recording for your video tutorial. And it’s free without a watermark. Check 8 best free screen recorders without watermark.
- Record Screen and Edit Video Recording in a Row. After the screen recording is done, the recorded video (mp4) can be further edited in a versatile video editor. Extremely useful for instant video tutorials and e-learning video editing.
- Private and Safe.Your videos and photos and music won’t be uploaded to the webserver or other third parties. Free of being hacked.
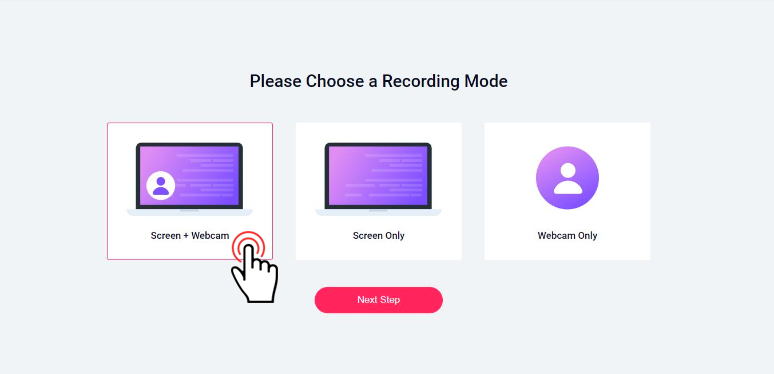
Choose a recording mode in RecordCast

Private and safe desktop screen recording
How to Use RecordCast, a Free Desktop Recorder, for Screen Recording
So now, let’s get started to capture your screen with all-in-one RecordCast, a revolutionary desktop recorder on windows.
All you need to do is choose recording mode first and then record the screen and finally edit your video recording in the video editor (optional).
Step 1 Select the Recording Mode. Access the RecordCast desktop recorder and opt for the recording mode you prefer as follows:
- Screen + Webcam
- Screen Only
- Webcam Only
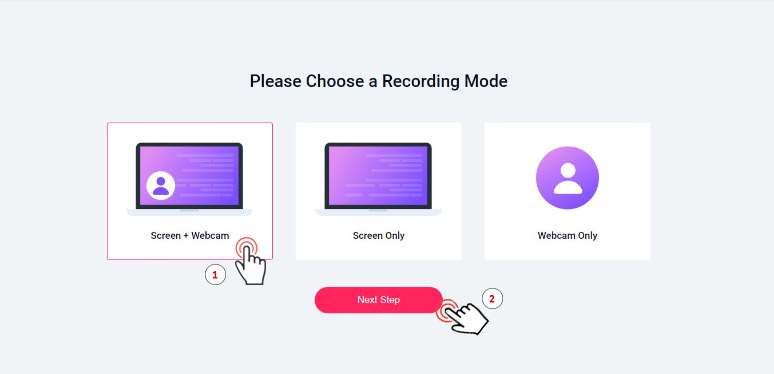
Select a recording mode in RecordCast
Then press ‘Next Step’ to proceed.
Step 2 Adjust Audio Recording Settings. You can choose multiple audio recording modes:
- Microphone + System Audio
- Microphone
- System Audio
- No Audio
Check 5 best mac screen recorders with audio in 2021.
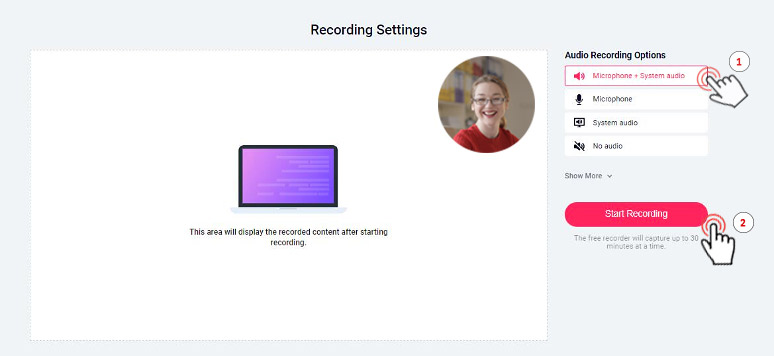
Adjust the audio setting in RecordCast
You may also freely position the small webcam video inside the bigger video frame.
Step 3 Start Recording the Screen. Next, click on the ‘ Start Recording’ button. You will see a pop-up window, offering you options to record your entire screen or the running applications on Windows or the Chrome tab, i.e. the running webpages.
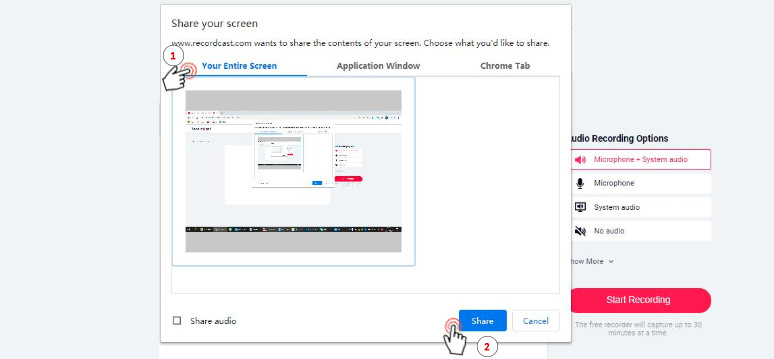
Select the recording area in RecordCast
Choose one, then the recording begins, which currently can last to 30 mins.
Step 4 Preview the Recorded Video. During the recording, you may either pause a recording or continue with it. If you want to end it, simply press the ‘Stop’ button and go back to the RecordCast page. Then you can preview the screen you just recorded.
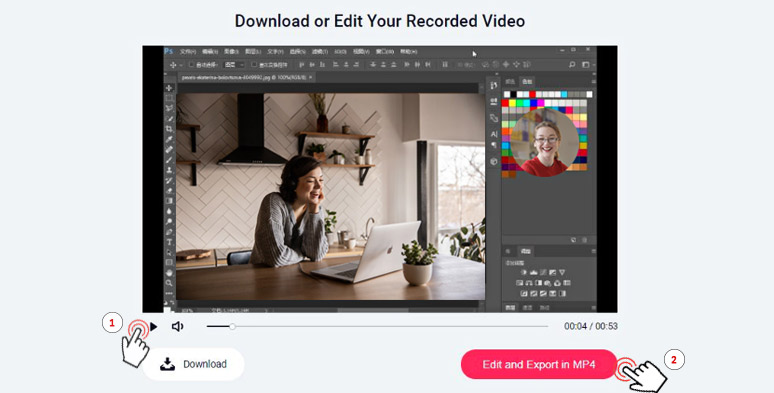
Preview the recorded video and opt to keep editing it
Insider Tips:
At this point, you may choose to download the video in WebM format or proceed to edit the recorded video by pressing the ‘Edit and Export in MP4’ button, highly recommended.
Step 5 Edit the Recorded Video Online.
With the “Edit and Export in MP4” button, you can proceed to edit your video online for video now. You will find that the recorded videos have already been added to the timeline.
Now, you can easily drag the selection bar to decide the video duration or position your small video window anywhere in the video and adjust its mask size, which is quite useful for demonstrating how-to tutorial video and e-learning. Also read how to create a product explainer video for Alibaba and Amazon.
You may also add still captions and animated texts and expertly-designed moving elements to highlight the video. This a helpful free key feature to grasp the attention of the viewers like students. Get free screen recorders and video editors for Windows/Mac.
For freelancers and small business owners, you can use readymade overlays to add texts, upload your logo or add an intro or outro to your video. Super helpful and no professional skills are needed.
At last, click on the ‘export’ button to download the edited video recording in 1080p in a split second.
Final Thoughts
If you happen to be an e-learning trainer or freelancer who heavily relies on on-screen recordings for how-to video tutorials and webinars, the latest desktop recorder like RecordCast can be a game-changer for your life.
Its free and user-friendly in-browser desktop recorder and versatile online video editor saves you tons of time for post-processing. Besides, it’s free for use and is as easy as ABC.
So, start recording your first video with RecordCast desktop recorder now.

